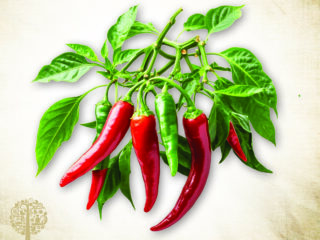
If you time planting your chilies out just right, when nighttime temperatures are reliably warm (preferably above 18°C / 64°F), you can grow true monsters. Many novice growers plant out too early, leading to premature flowering and fruiting—and, accordingly, paltry harvests.
If you follow my advice, start them early indoors and plant them out when summer has properly kicked in, you’ll have another problem to deal with. By late August and early September, those six small plants you hatched indoors under grow lights back in February will be dripping with hundreds of garish red pods.
The Trinidad Scorpions are practically daring you to touch them. The Lemon Drops are almost embarrassing you with their overachievement. And somewhere, buried under the Cayenne bush riot, even the weeds are crying for help.
So, what can you do with shopping bags full of freshly harvested chilies? Eat them all in one heroic sitting? No, you preserve them. Because few things say “grown-up gardener” like casually producing your own smoky chipotle paste in the dead of winter while wearing an apron that says “Chili Daddy.”
Here’s your spicy survival guide to preserving chilies. I’ve listed eight different preservation methods below, but I describe the easiest and most popular in the most detail—these first three will handle 90% of your chili surplus with minimal fuss and maximum satisfaction.

1. Drying: The Desert Treatment
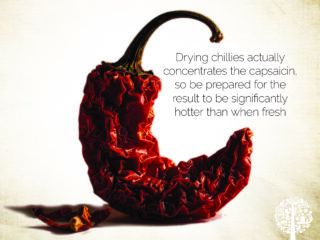
First, a polite word of warning. Drying chilies actually concentrates the capsaicin, so be prepared for the result to be significantly hotter than when fresh. This method works well in various climates with proper technique and patience.
– Air Drying / Ristras
Air drying works beautifully for thin-skinned varieties like cayenne, Thai, or Ají Amarillo. The traditional method is simple: thread them onto strong cotton string or fishing line, leaving gaps between pods for airflow, then hang them somewhere with good ventilation and low humidity. In 2-6 weeks, depending on conditions, you’ll have your very own garland of concentrated fire.
Here’s a useful pointer: for very small varieties like Bird’s Eye chilies, don’t string them individually. (You’ll age too much in the process.) Cut entire branches with clusters and hang those instead. They dry more slowly, which preserves more flavor compounds.
The key rule for air drying: thick, fleshy varieties like jalapeños or habaneros can be challenging unless you slice them first or have exceptionally dry conditions. Otherwise, you risk mildew and disappointment.
Top Tip: Never hang them over your cooker! Grease and humidity will ruin them. Also, nothing ruins dinner like a chili dripping into your stir-fry.
– Dehydrators and Oven Drying
For dehydrators, set to 55°C (52°C for delicate varieties) to preserve nutrients and prevent case hardening. Slice thick chilies and expect 8-12 hours. Oven drying works too—door ajar, lowest temperature setting (ideally under 60°C), check regularly to prevent overheating.
2. Freezing: My Favourite “Lazy Genius” Solution
Freezing preserves heat and flavor excellently for 6-12 months in home freezers. I’ve used year-old frozen chilies that were still wonderfully potent. The texture goes soft—useless for garnishing but perfect for cooking.
Freeze whole chilies on trays first, then bag them. This stops them from clumping together so you can grab exactly what you need.
– Cubes puree: Portion Control
Blend chilies with a splash of water, freeze them in ice cube trays, and then bag the cubes. One cube typically equals 1-2 fresh chilies. Perfect for precise dosing in recipes.

3. Pickling: The Vinegar Vacation
Pickling transforms chilies—the acetic acid preserves them while mellowing heat and adding a sharp tang. My favorite is Giant Jalapeño sliced into rings for wraps and pizza.
– Quick Pickle Method
For relatively quick gratification, try quick pickling. (It feels very ‘cheffy’!) Slice your chilies, toss with salt and sugar, add coriander seeds and black peppercorns, and cover with quality vinegar. Store in the fridge and wait at least 2-3 hours, though they’re best after 24 hours as flavors properly meld. They’ll keep for several weeks refrigerated.
– Proper Pickling for Long-term Storage
For shelf-stable pickles that last a year or more, sterilize your jars in boiling water, prepare a proper brine (made from equal parts vinegar and water, with added salt and sugar), and process them in a boiling water bath for 10 minutes. The extra effort pays dividends when you’re pulling perfectly preserved chilies from your pantry in February, remembering the abundance of summer.
The Advanced Arsenal: Quick-Fire Methods for Preserving Chilies
Once you’ve mastered these three foundational techniques, you can explore more complex preservation methods that reward patience with exceptional results.
- Fermenting uses beneficial bacteria to transform chilies over 2-4 weeks, creating complex, funky flavors. Chop the chilies, submerge them in a 2-3% salt brine, weigh them down, and wait. Great for preserving and developing the character of Scotch Bonnets.
- Chili Oil & Confit creates liquid gold. But don’t mess about with safety—botulism is real with chilies in oil. Even with dried chilies, add acid (vinegar or citric acid) or keep them refrigerated for safety. Fresh chilies should always be acidified or kept frozen/refrigerated. Bay leaves and Sichuan pepper are welcome additions.
- Jam, Paste & Sauces turn surplus into condiments. One year, I made habanero-mango sauce that looked like baby food and punched like Tyson. People still talk about it. Some in therapy.
- Salt Preservation is criminally underrated. Chop chilies, mix with 20-25% salt by weight (this percentage is crucial for safety), pack into sterilized jars, and ignore for a week. The result looks terrible but tastes incredible—a spicy sludge that lasts months and transforms anything it touches.
- Candying works with mild varieties—simmer in a sugar syrup until they are sticky and translucent. Using Ghost Peppers is how family feuds begin.
The Philosophy of Preservation
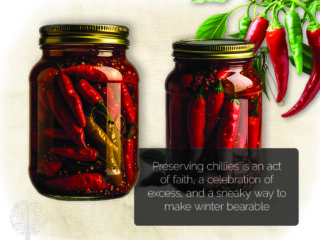
Preserving chilies is an act of faith, a celebration of excess, and a sneaky way to make winter bearable. Next time your chili plants go nuclear, don’t panic. Pick your method. Channel your inner spice whisperer. Make things in jars and give them names like “Molten Midnight” or “The Regret.”
And if your neighbors start being overly friendly come September, it’s because they remember last year’s gift jar of Inferno Jam. They’re back for more—or possibly vengeance.
Now, if you’ll excuse me, I’ve got a ferment bubbling ominously and a label to redesign. Currently thinking: “Caution—May Ruin Lunch.”
Stay spicy, you glorious maniac.

