

Homemade blackberry pie is one of those summer desserts that takes me back to memories of my childhood. After spending what seemed like hours picking the berries, I knew that I would be rewarded with the most amazing tasting pie for dessert that evening.
This year in Ohio, the blackberries are ripening just in time for Independence Day, which is a little earlier than usual. I’m not complaining though – there’s something pretty perfect about warm weather, fresh berries, and the smell of a pie baking right before the holiday.
Every summer, I try to make at least one homemade blackberry pie with fresh berries. If I have time, I will still go pick them myself, but some years I’ll just grab a few pints at a local farm stand.

Either way, I’m always happy when I get my hands on good blackberries- they’re big, juicy, and full of tart-sweet flavor that holds up well when baked into a pie.
And the best part? This recipe is simple and easy to make. Just a basic buttery pie crust (homemade or store bought), a little sugar, a thickener to help hold it all together, and a squeeze of lemon juice to brighten up the filling. That’s all you really need when the fruit is at its peak.
Blackberries vs. Black Raspberries
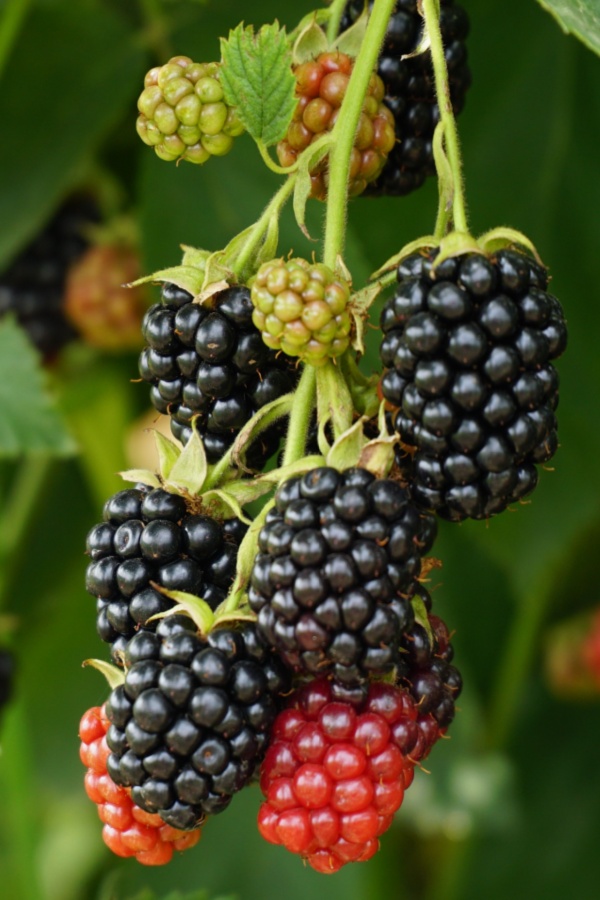
Before I get too far into my homemade blackberry pie recipe, let me explain the difference between blackberries and black raspberries. A lot of people mix them up, and they do look similar at first glance, especially when they’re just picked.
The biggest giveaway is the shape and structure of the berry. Black raspberries are hollow in the middle when you pick them, kind of like red raspberries.
The core stays on the plant, and you’re left with a little thimble-shaped berry. They also tend to be smaller and have a dusty or matte finish on the skin.
Blackberries, on the other hand, stay solid when you pick them. The white core stays inside the berry, so they’re heavier, juicier, and more tart.
They also have a shinier, more plump look. Blackberries are what you want for this pie recipe. Black raspberries are delicious too, but they’re a little more delicate and break down more quickly when cooked.
Adjusting for Juicy Berries
The one thing to keep in mind when making homemade blackberry pie is how juicy your berries are. Some blackberries, especially the early ones, can be a little firmer.
Later in the season, or if there’s been a lot of rain, the berries can be softer and more full of juice. That extra liquid can make your pie runny if you don’t account for it.
I like to use flour or cornstarch as a thickener in the filling. Both work well, but if your berries are very juicy, you may need to use a little more than usual.
In the recipe below, I list a range of how much thickener to use. If your berries are firm and just lightly juicy, go with the lower amount. If they’re dripping juice as you rinse them, go with the higher end.
Another tip: let the pie cool completely before slicing. It’s tempting to dig in while it’s still warm, but the filling needs time to set. If you cut it too early, it may look runny even if the thickener did its job.
Making the Crust
You can use a store-bought pie crust if you want to save time, but I try to make a homemade crust when I make a blackberry pie. The flavor and texture are just better, and it’s honestly not that hard once you get the hang of it.
The key is to keep the butter cold and not overwork the dough. If you’re baking for the Fourth of July or bringing this pie to a get-together, a homemade crust really does make it special.
I use an all-butter crust for this one, but you can substitute half shortening if you like a softer bite. The butter helps give it that golden, flaky finish, and it pairs nicely with the sweet-tart blackberry filling.

Filling Tips
The filling is simple to make, but it is important to get it right. I always taste a few berries before I start mixing, as it helps me decide how much sugar to use. If the berries are extra sweet, I’ll cut the sugar back by a tablespoon or two. If they’re more tart, I’ll leave the full amount or even add a touch more.
Don’t forget the lemon juice. Just a tablespoon helps brighten the whole pie. It keeps the berries tasting fresh and balances the sweetness without making the pie taste lemony.
Homemade Blackberry Pie Recipe
*Complete recipe instructions including specific measurements, cook temperatures and times are located in a printable recipe card at the bottom of this article. However, be sure to keep reading for helpful tips and tricks when making this recipe.
Ingredients
Crust:
- 2 1/2 cups all-purpose flour
- 1 teaspoon salt
- 1 tablespoon granulated sugar
- 1 cup (2 sticks) cold unsalted butter, cubed
- 6-8 tablespoons ice water
Filling:
- 5 cups fresh blackberries (about 2 pints or 1 1/2 pounds)
- 3/4 to 1 cup granulated sugar (adjust to taste)
- 3 to 4 tablespoons all-purpose flour or 2 1/2 to 3 tablespoons cornstarch (adjust for juiciness)
- 1 tablespoon freshly squeezed lemon juice
- 1/4 teaspoon salt
- 1 tablespoon butter (to dot the filling)
Assembly:
- 1 egg + 1 tablespoon water (egg wash)
- Coarse sugar for sprinkling (optional)
INSTRUCTIONS FOR HOMEMADE BLACKBERRY PIE
1. Make the pie crust.
In a large bowl, whisk together the flour, salt, and sugar. Add the cold butter and use a pastry cutter or your fingers to work it into the flour until the mixture looks like coarse crumbs. Add the ice water, one tablespoon at a time, mixing gently until the dough comes together. Divide in half, shape into two disks, wrap in plastic, and chill for at least 1 hour.
Option: You can also use store-bought refrigerator pie crust. Just be sure to let it warm slightly so that you can roll it out without cracking.
2. Preheat the oven to 400°F.
Set a rack in the lower third of the oven to help the bottom crust cook evenly.
3. Make the homemade blackberry pie filling.
In a large bowl, combine the blackberries, sugar, flour or cornstarch, lemon juice, and salt. Gently toss to coat the berries. Let the mixture sit for 10–15 minutes while you roll out the crust.
4. Assemble the pie.
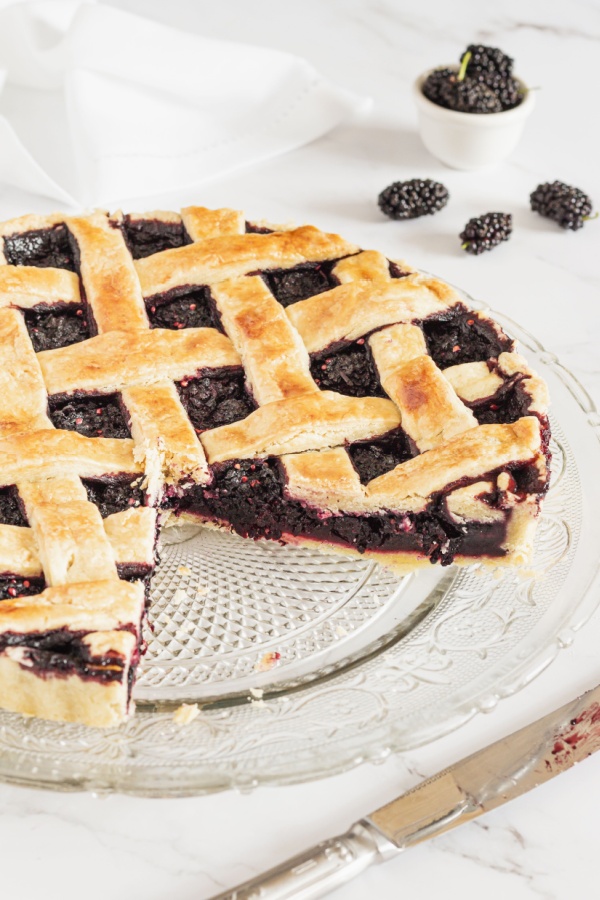
Roll out one disk of dough on a floured surface and fit it into a 9-inch pie plate. Pour in the filling and dot with small pieces of butter. Roll out the second disk and place it over the top. You can do a full top crust with slits, a lattice crust, or use cutters for shapes. Trim and crimp the edges to seal.
5. Brush with egg wash and sprinkle with coarse sugar if using.
This gives the pie a nice golden finish and a little crunch on top.
Baking Time Required:
6. Bake the pie.
Place the pie on a baking sheet to catch any drips. Bake at 400°F for 20 minutes, then reduce the oven to 350°F and bake another 30–40 minutes, until the crust is golden and the filling is bubbling through the vents.
7. Cool completely.
Let the pie cool on a wire rack for at least 2–3 hours before slicing. This helps the filling set so you get clean slices.
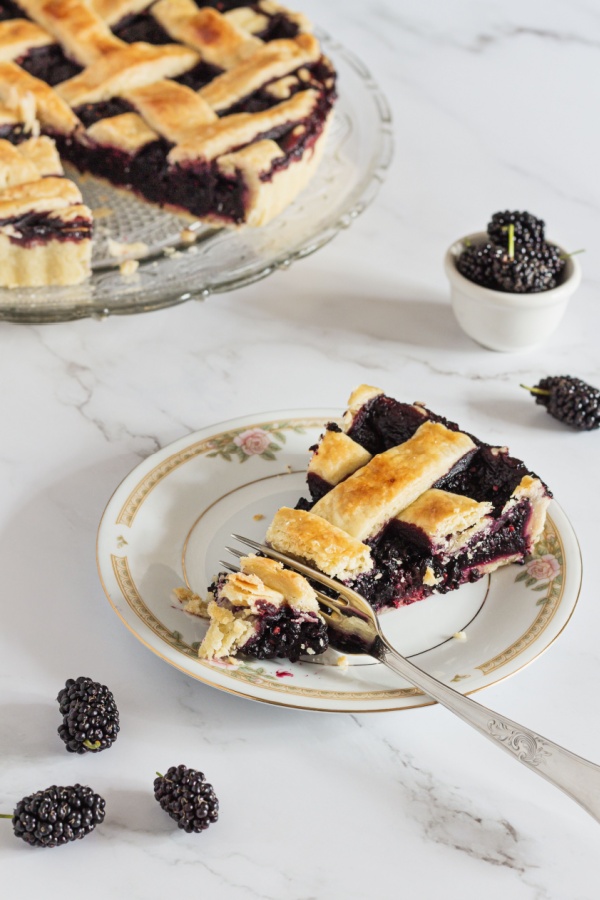
I love serving this homemade blackberry pie as-is, but you can always add a scoop of vanilla ice cream or a little whipped cream if you want to make it even better.
If you’ve got fresh blackberries ripening early like we do in Ohio this year, now’s the time to make this pie. It’s a simple way to celebrate the season, and nothing beats a homemade blackberry pie made from berries you picked yourself or bought fresh from a local Farmer’s stand.
Enjoy!
Mary and Jim


Jim and Mary Competti have been writing gardening, DIY and recipe articles and books for over 15 years from their 46 acre Ohio farm. The two are frequent speakers on all things gardening and love to travel in their spare time.
As always, feel free to email us at thefarm@owgarden.com with comments, questions, or to simply say hello! You can sign up for our free email list in the subscribe now box in the middle of this article. Follow us on Facebook here : Owg facebook. This article may contain affiliate links.
Prep Time
30 minutes
Cook Time
50 minutes
Additional Time
1 hour
Total Time
2 hours 20 minutes
Ingredients
For the crust:
-
2 1/2 cups all-purpose flour
-
1 teaspoon salt
-
1 tablespoon granulated sugar
-
1 cup (2 sticks) cold unsalted butter, cubed
-
6–8 tablespoons ice water
For the filling:
-
5 cups fresh blackberries (about 1 1/2 lbs)
-
3/4 to 1 cup granulated sugar (adjust to taste)
-
3 to 4 tablespoons all-purpose flour or 2 1/2 to 3 tablespoons cornstarch (based on juiciness)
-
1 tablespoon freshly squeezed lemon juice
-
1/4 teaspoon salt
-
1 tablespoon unsalted butter (to dot the filling)
For assembly:
-
1 egg + 1 tablespoon water (egg wash)
-
Coarse sugar for sprinkling (optional)
Instructions
- Make the crust: In a large bowl, whisk together flour, salt, and sugar. Cut in the cold butter until mixture resembles coarse crumbs. Stir in ice water, one tablespoon at a time, until dough comes together. Divide in half, shape into disks, wrap in plastic, and chill at least 1 hour.
- Preheat oven to 400°F. Place a rack in the lower third of the oven.
- Prepare the filling: In a large bowl, combine blackberries, sugar, flour or cornstarch, lemon juice, and salt. Toss gently and let sit for 10–15 minutes.
- Assemble the pie: Roll out one dough disk and fit into a 9-inch pie plate. Add filling and dot with butter. Roll out second disk and place on top (full or lattice crust). Trim and crimp the edges.
- Brush top with egg wash and sprinkle with coarse sugar, if using.
- Bake: Place pie on a baking sheet. Bake at 400°F for 20 minutes, then reduce heat to 350°F and bake 30–40 minutes more, until crust is golden and filling is bubbling.
- Cool completely before slicing—at least 2–3 hours.