

Building raised beds takes time and money, so watching them deteriorate after just a few seasons is never fun. Some beds last three to four years before failing, while others hold up for a decade or more. Sadly, I’ve had a set of wooden beds last only one year before I had to take them down. Lessons learned.
You can’t make raised beds last foreverbut you can significantly extend their useful life without complicated preservation techniques or expensive materials. Material choices and a few maintenance habits slow the inevitable decay.
Follow these tips to make your raised beds last longer. They mostly apply to wooden raised beds, as these require the most maintenance to extend their life span, but the tips can generally be applied to all raised bed types.
Large Modular Metal Raised Garden Bed Kit – 29” Extra Tall
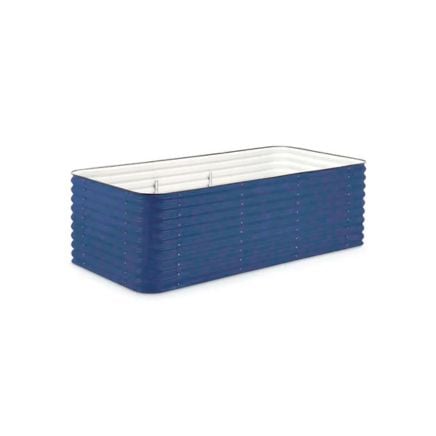
Large Modular Metal Raised Garden Bed Kit – 29” Extra Tall
Small Modular Metal Raised Garden Bed Kit – 29” Extra Tall
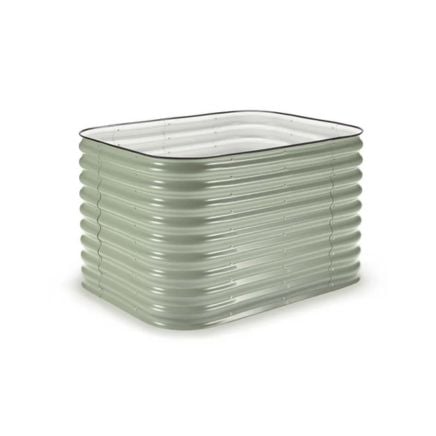
Small Modular Metal Raised Garden Bed Kit – 29” Extra Tall
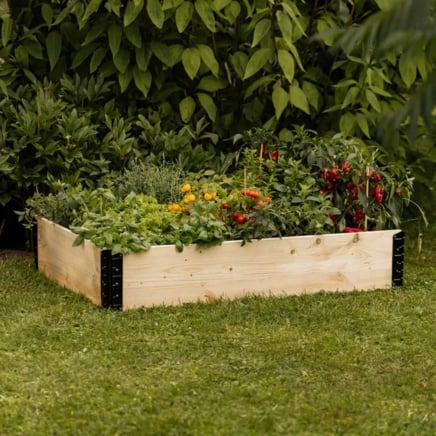
Epic GardenBox
Choose Durable Materials
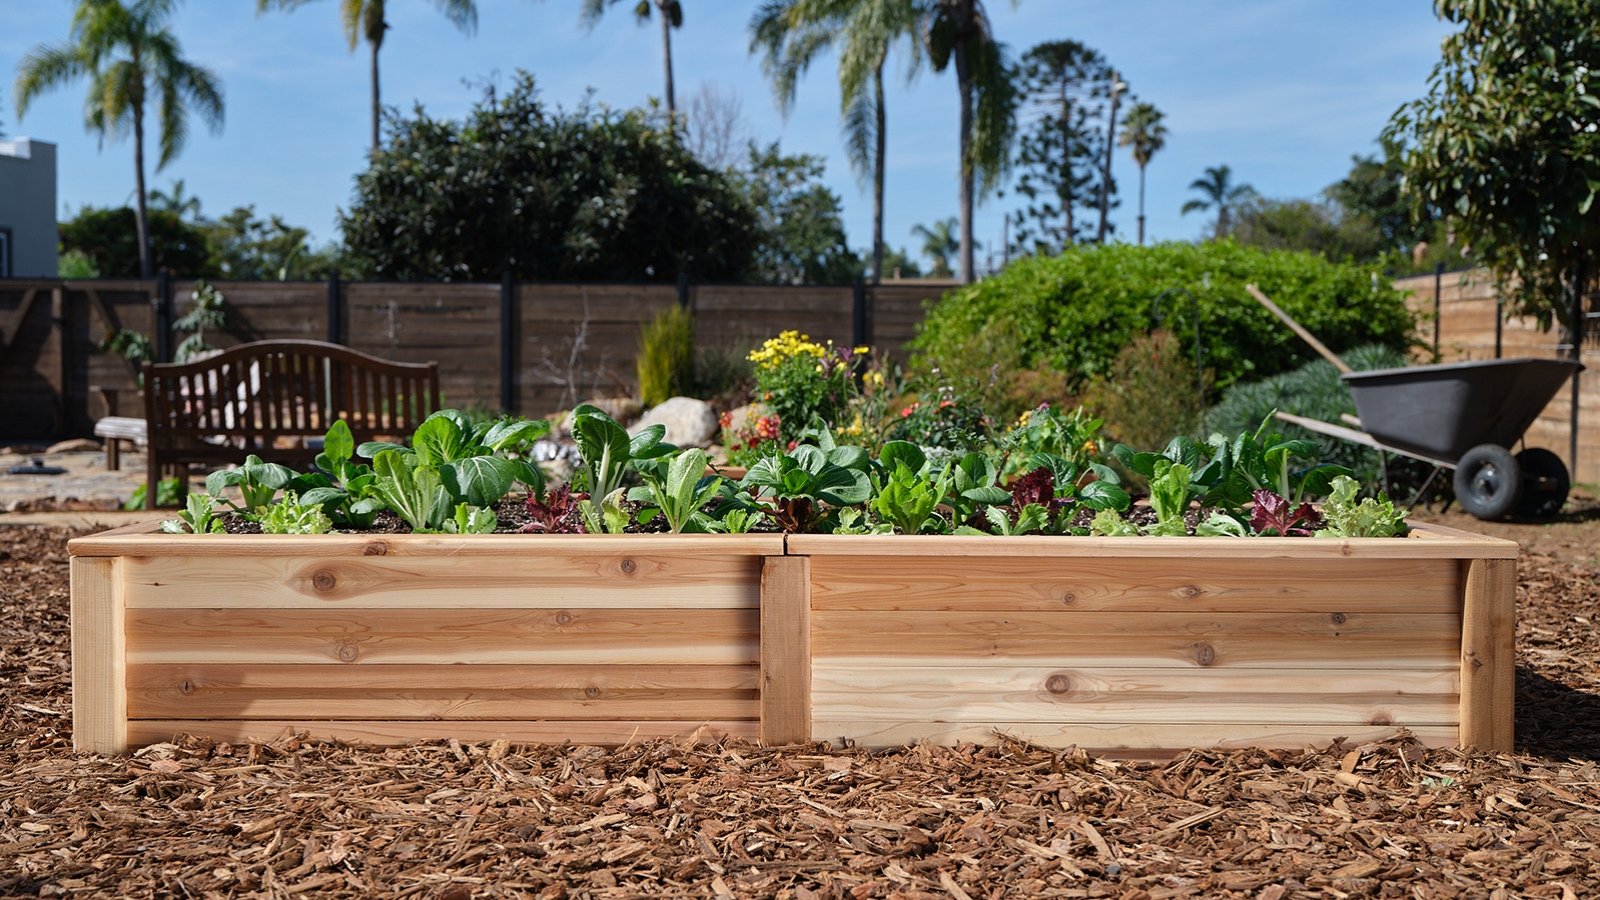
DIY raised beds are often made from wood, but not all woods are equal. Cedar and redwood contain natural oils that resist rot and insect damage. These woods cost more upfront than something like pine, but they last two to three times longer, which makes them cheaper in the long run when you factor in replacement costs.
Avoid pressure-treated lumber if you’re growing edibles. The chemicals used in treatment can leach into soil over time, though newer treatments are considered safer than older formulations. If you use treated wood, line the inside of the bed to create a barrier between wood and soil.
Metal beds (galvanized steel or aluminum) essentially last indefinitely in terms of structural integrity. They cost more than wood beds, but since they don’t need short-term replacing, they’re definitely worth the investment long-term.
If you already have your raised beds, this tip won’t really make your current raised beds last longer, but it is something to think about when you’re replacing old ones.
Seal Wooden Beds
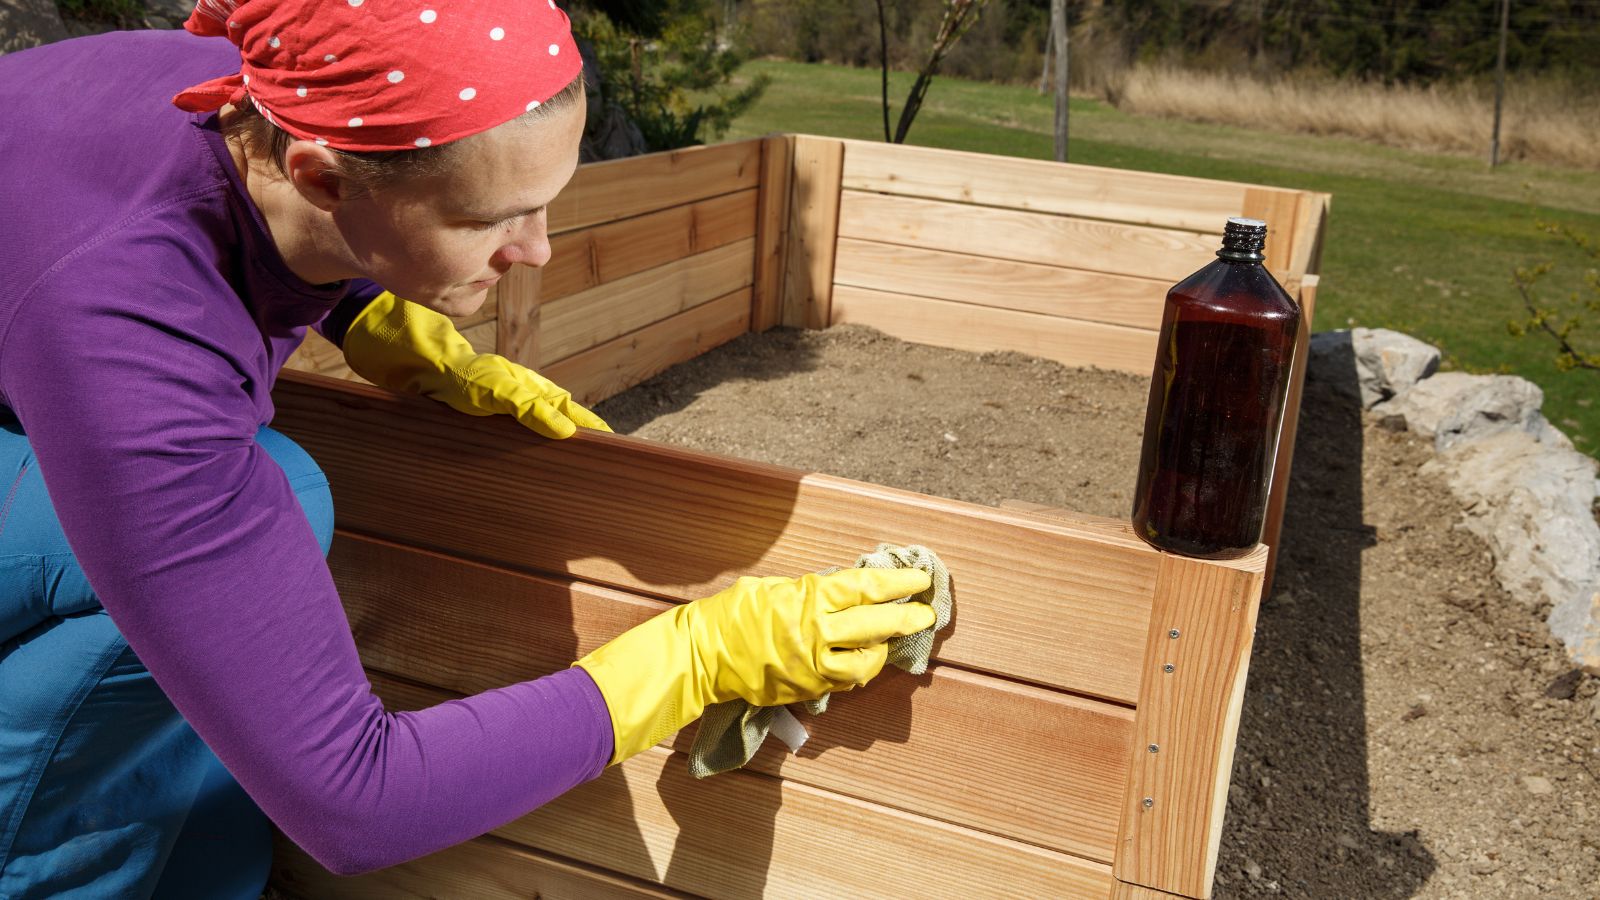
Raw wood absorbs water and begins rotting from the moment it contacts wet soil. A protective sealant slows this process by creating a moisture barrier on the wood surface.
Linseed oil works well for sealing wood and it’s safe around edible plants. Apply it to all surfaces of the wood, including ends and any cut edges, before assembling the bed. Pay particular attention to the bottom edges and any surfaces that will contact soil directly.
Reapply sealant every couple of years to maintain protection (or yearly if you can manage it). The coating breaks down over time from moisture exposure and UV light, so periodic reapplication extends the protective effect. This takes maybe an hour every few years and adds significant life to the beds.
Some gardeners use exterior deck sealant or wood stain rated for ground contact. These work fine as long as they don’t contain harmful chemicals that could leach into soil. Check product labels specifically for food-safety ratings if you’re growing vegetables.
Reinforce the Corners
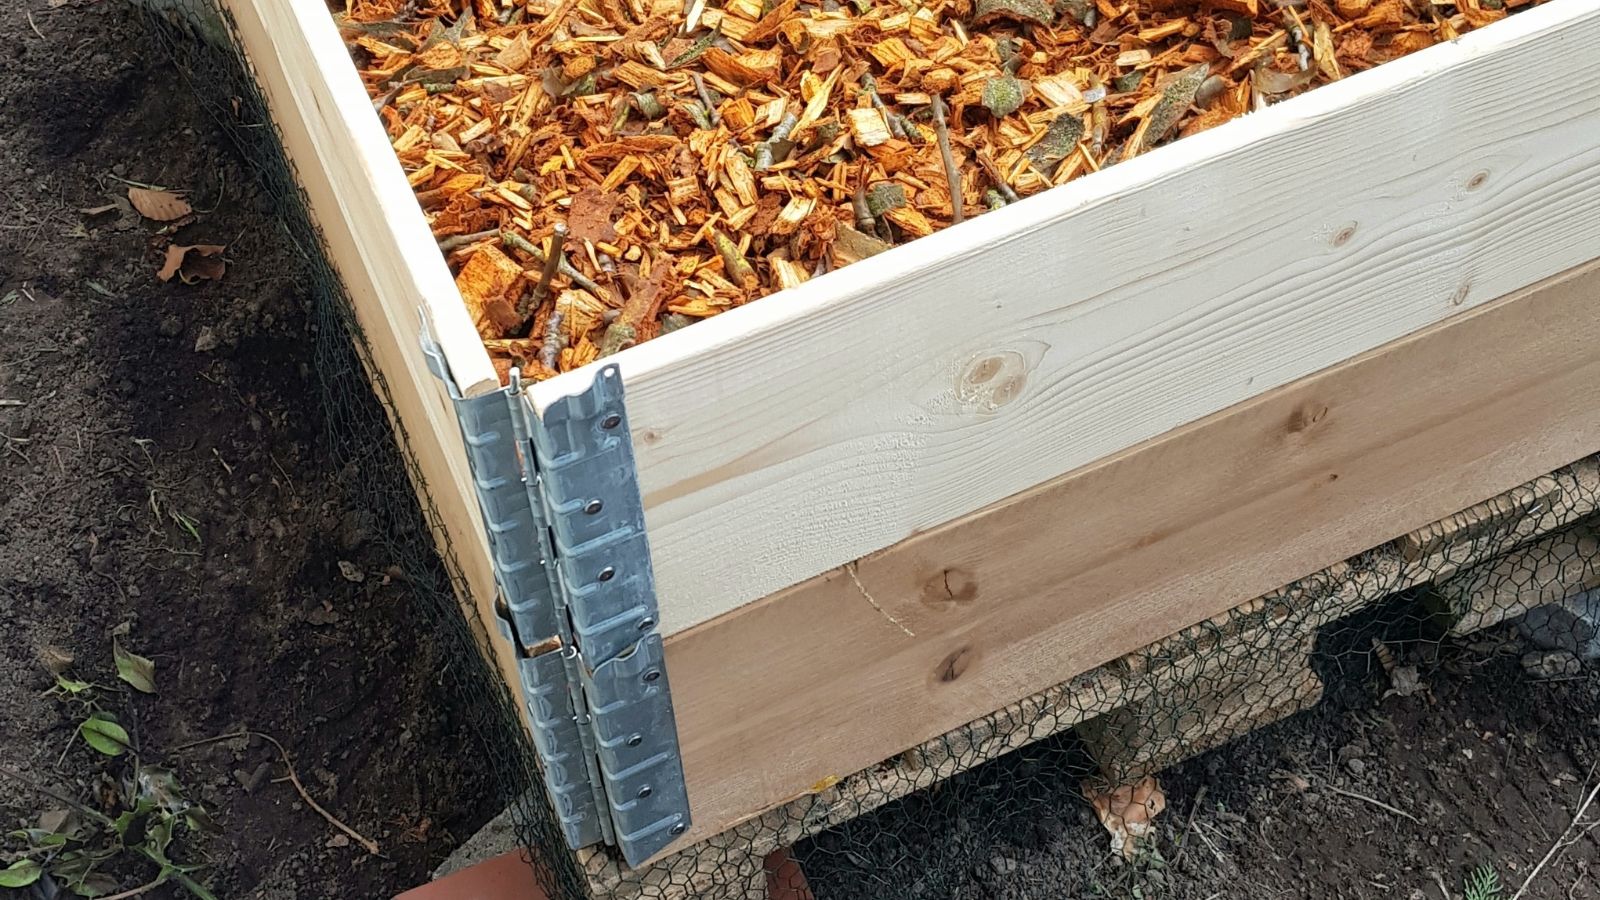
Corners bear the most stress in raised bed construction. Soil weight pushes outward constantly, and corners are where this pressure concentrates. Weak corner joints fail first, causing beds to bow and eventually collapse.
Simple joints where boards meet at right angles aren’t always strong enough for very long-term use in a garden. Add corner braces, brackets, or stakes that extend into the ground for additional support. Metal L-brackets work well for reinforcing inside corners.
Taller beds need more corner reinforcement than shallow beds. The additional soil height creates more pressure, which means corners work harder to resist the outward push. Add extra brackets or use thicker corner posts for beds over 12 inches tall.
Use a Solid Base
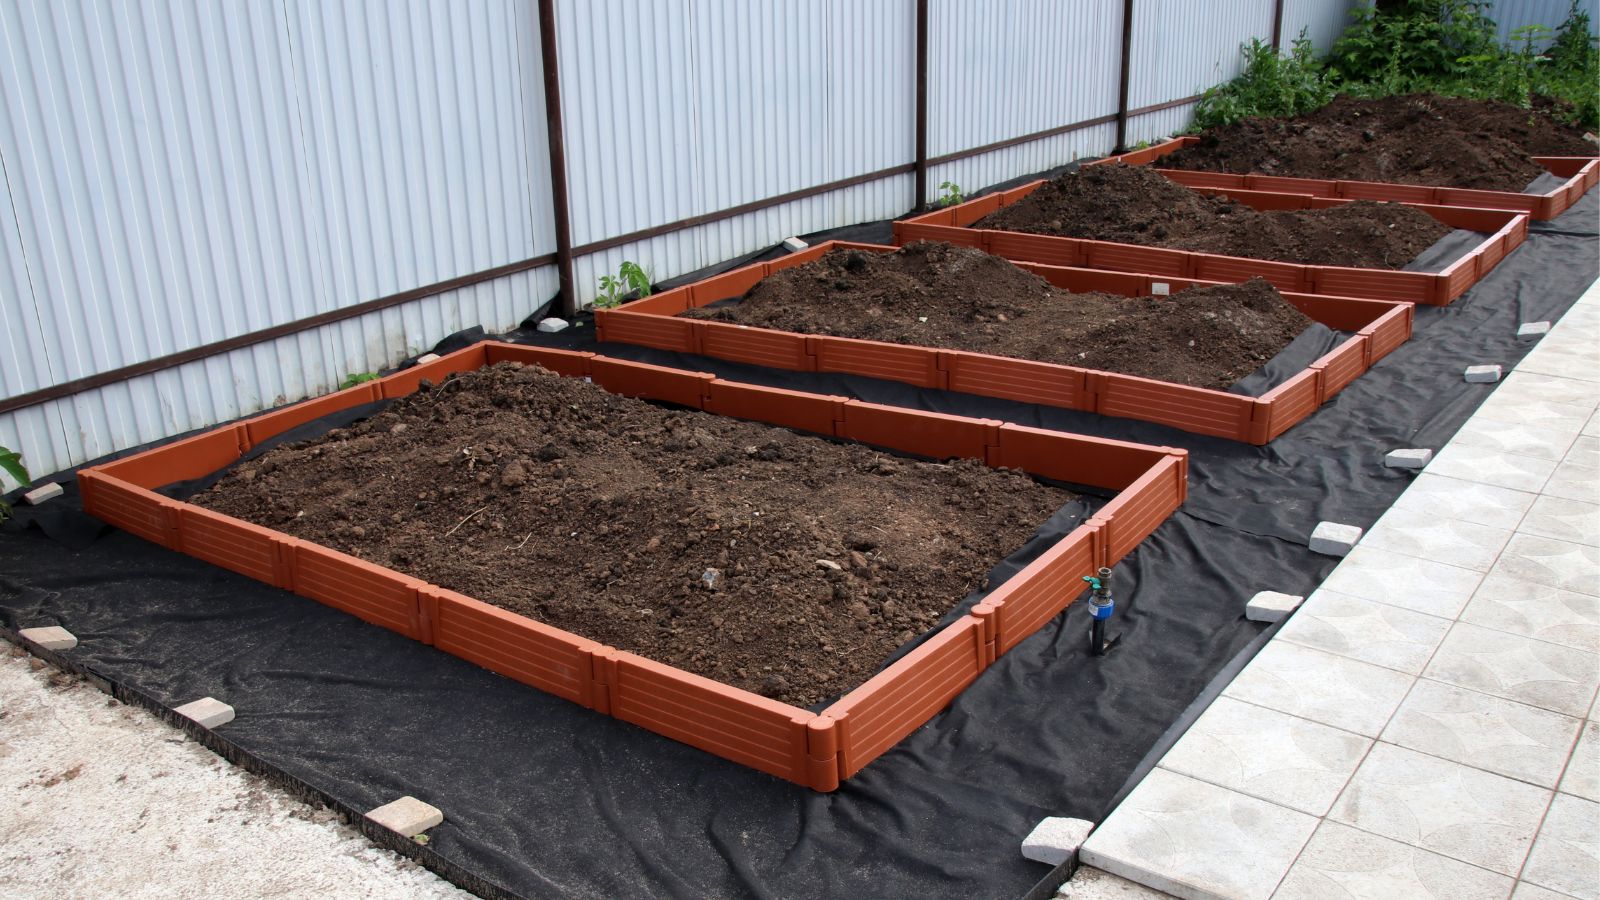
Raised beds sitting directly on grass or bare soil rot faster at the bottom where wood stays in constant contact with ground moisture. Elevating the bed slightly or creating a barrier between the wood and the ground slows this moisture exposure. Making sure the beds are level is vital, too.
A layer of gravel under the bed boosts drainage and prevents wood from sitting in standing water. The space between gravel particles allows air circulation under the wood, which helps it dry between rain.
Landscape fabric laid on the ground before adding gravel prevents weeds from growing up through the bed while still allowing drainage. This also creates a slight barrier between wood and soil moisture, though it’s not waterproof.
Some gardeners place beds on concrete pavers or flat stones at the corners. This elevates the wood off the ground entirely while still keeping the structure stable. The small air gap underneath allows moisture to escape instead of being trapped against the wood.
Check Water Drainage Around the Base
Beds positioned where water naturally collects stay wet longer and rot faster. Even well-built beds fail when they’re sitting in poor drainage conditions.
Watch where water flows during heavy rain. If it runs toward your beds and pools around them, you’re creating conditions for rot. Redirect water flow by adjusting the ground slope, adding drainage channels, or relocating beds to better-draining spots.
Gutters and downspouts that dump water near raised beds create constant moisture problems. Redirect downspouts away from bed locations or use splash blocks to disperse water before it reaches the beds.
Avoid Overwatering

Keeping soil constantly saturated accelerates wood rot from the inside. Water that doesn’t drain properly stays in contact with wood longer, creating perfect conditions for decay organisms.
Water only when soil actually needs it rather than on a fixed schedule, regardless of conditions. This not only makes your raised beds last longer, but it’s also important for the plants, too.
Drip irrigation is better for raised bed longevity. These methods deliver water directly to soil without splashing water onto wood surfaces constantly. Make sure beds have adequate drainage holes or gaps at the bottom for excess water to escape. The soil should drain within hours after watering, not stay waterlogged for days.
Complete Seasonal Maintenance

Inspect beds at the start and end of each growing season for signs of damage or deterioration. Catching small problems early prevents them from becoming structural failures that require complete bed replacement.
Tighten any loose bolts or screws. Wood shrinks and swells with moisture changes, which gradually loosen things over time. A quick check and tightening session takes minutes and prevents corners from separating.
Clear debris from around the base of beds before winter. Leaves, mulch, and plant material that pile up against wooden walls hold moisture and create habitats for insects. Keep the area immediately around beds relatively clear to promote air circulation and faster drying.
Check for insect damage, particularly carpenter ants and termites. These pests can hollow out wooden boards from the inside while leaving the surface relatively intact. Soft spots or hollow sounds when you tap the wood indicate insect activity that needs addressing.